Tech
Studio
Firstly, we'll start with what it is. After Effects is a motion graphics creator with endless possibilities. It can cross over as a video editor but you'd usually turn to Premier Pro to properly edit video content. The options AE give you from the off are so vast it can be totally daunting to get going, especially if you were to open a current project and wonder what on earth is in front of you.
One of the main features Adobe have rolled out in recent years is the ability to adapt your workspace to the way you like it. Now this is very useful but it does mean you can fire up the same program and the UI (User Interface) is totally different to what you are used to. So the first port of call is to get all the windows where you want them. They tend to go like this:
The default tends to look like this and works for us!
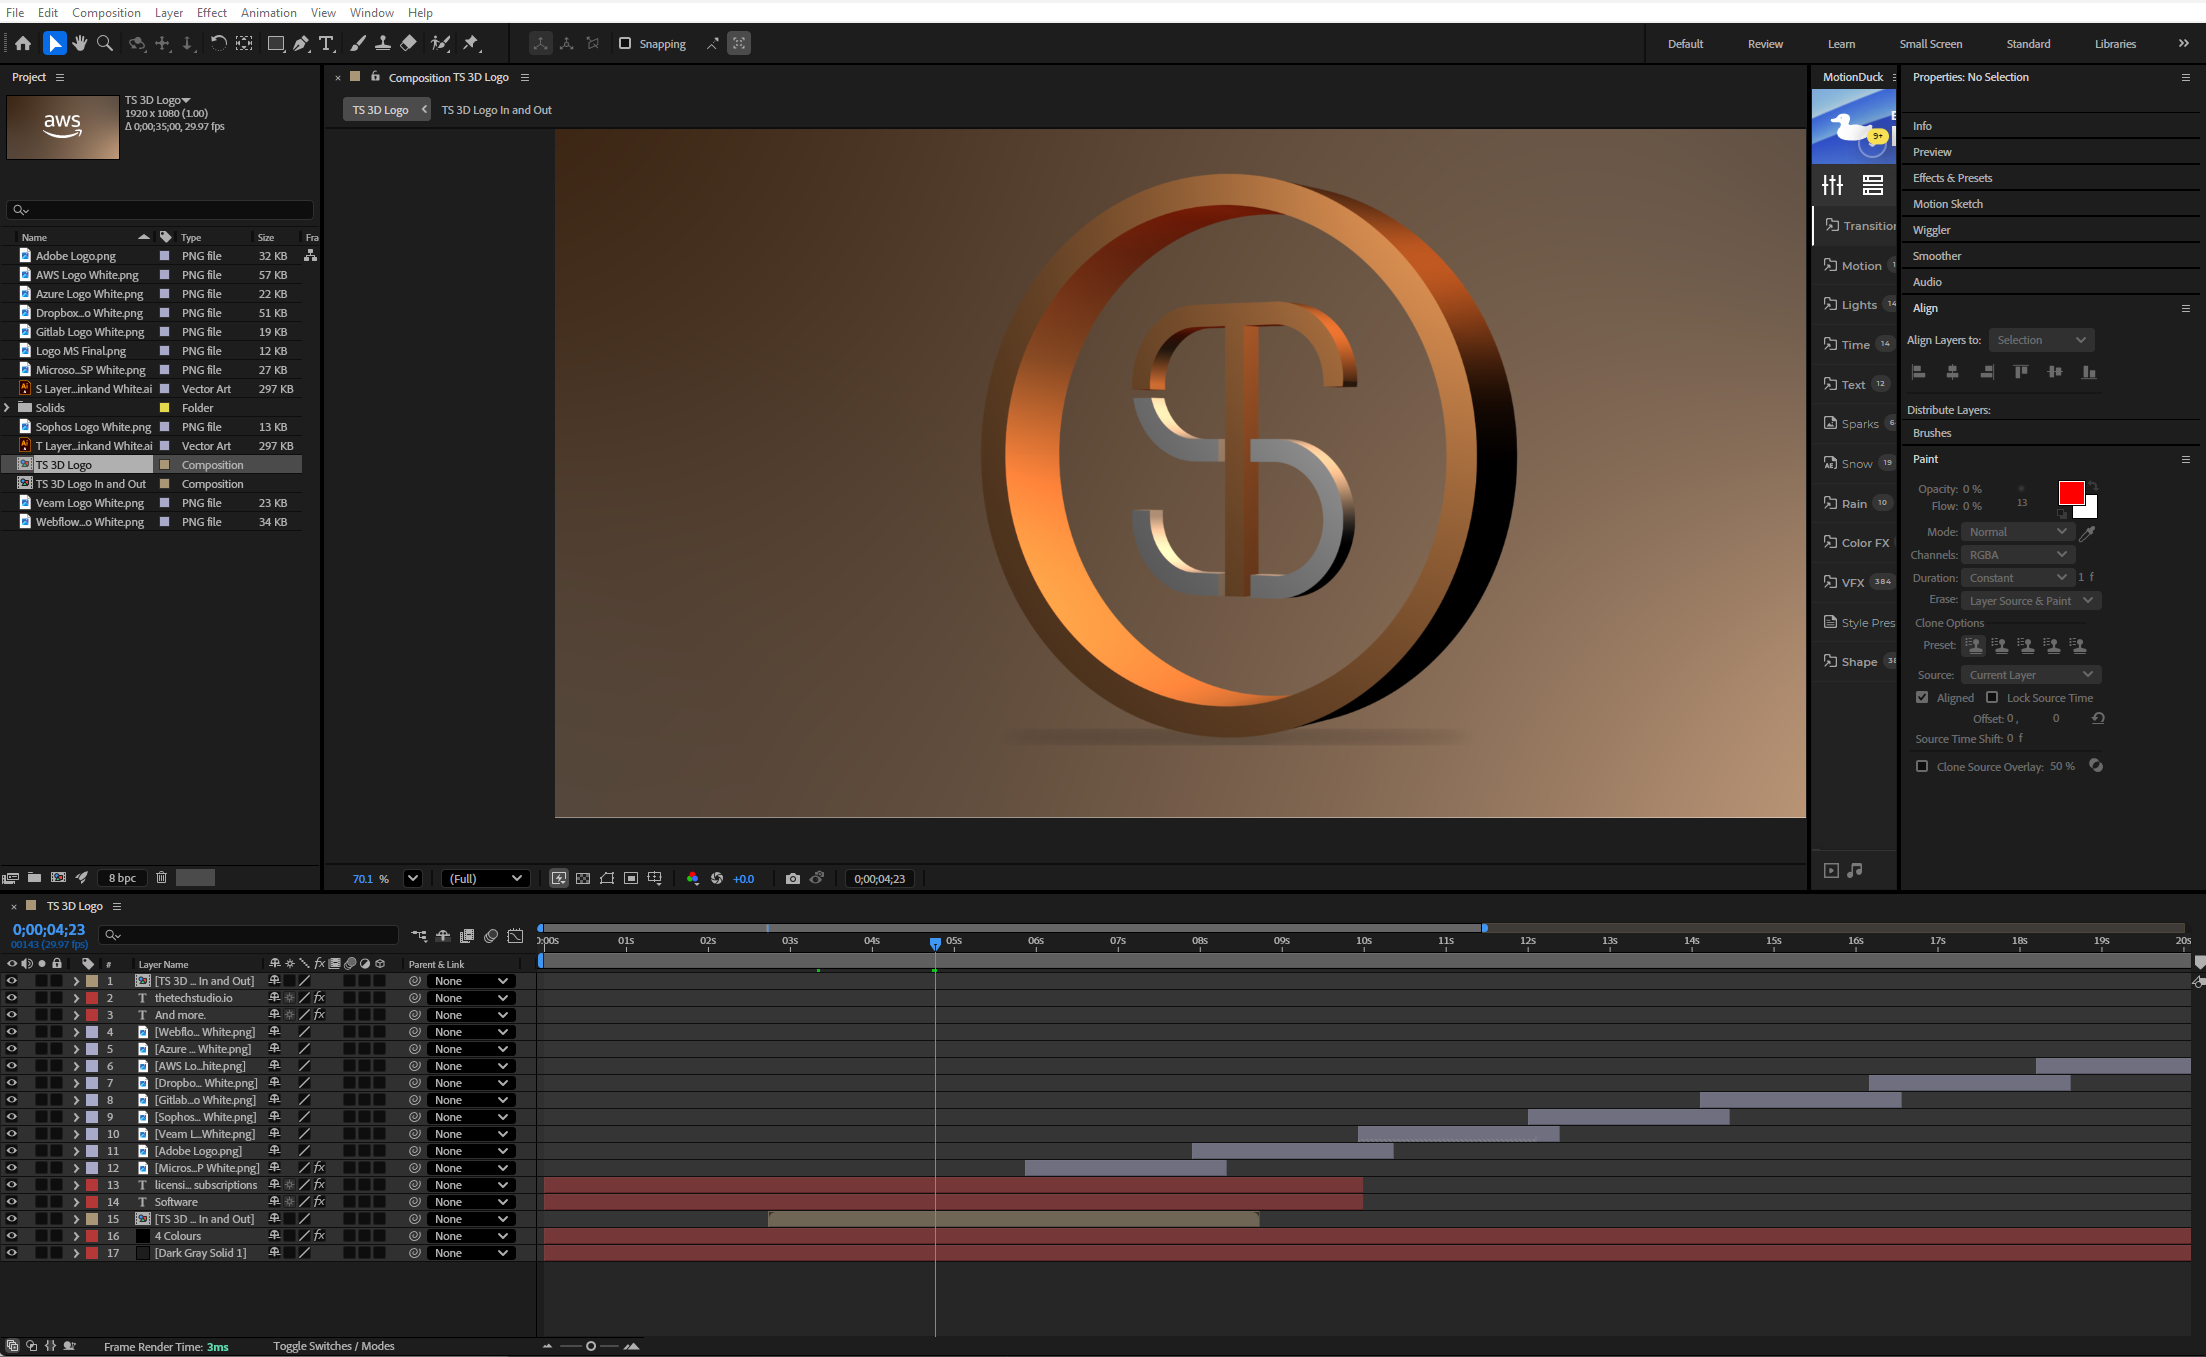
Agreed. It looks like organised chaos but we can break it down to its components. To see the final video, have a look here on Vimeo. It's advertising our software offerings.
So top left is where you organise your files. As with any project, you need some assets to work with. Simple. The timeline at the bottom is where you make things happen and we'll come back to that. The composition section is the 'canvas' as some may call it and where you work with the assets. You can actually change this to four different camera angles to see what is going on but let's stick with one for now. AE comes with a host of effects and presets you can drag on to an item, and they live top right alongside things like alignment, text options and loads more. So that's the workspace explained.
This is where it all happens. You can see 17 assets on the list above and you can take any of them and do anything with them you require. If you were to start with a single asset and use the basic properties, you'd edit position, scale, rotation and opacity. This is done by using keyframes which are the crux of this entrie piece of software.

As you can see above, you set keyframes for these properties to make stuff do things. Very simply, the position keyframe highlighted is how the item starts. So you place it where you want it and hit the diamond shape on the far left. You then move the playhead along (blue line) and move the item somewhere else and hit the diamond button again to create the second keyframe. This then animates whatever you decided. So if the item were to fly in from the left you'd start the item off canvas with a keyframe, move it in to the middle of the canvas and add another keyframe. AE takes care of the movement for you.
Well yes and no. So if you take that concept and then add it to any item but with a STACK of other properties, you can create anything. If you add scale and opacity to an item, you'll get the effect we used for the software logos in the video.
That's just scratching the surface, but if you understand the keyframing aspect of AE, you can move forward with things like:
Have a look at some of our videos on vimeo here.
